Generating and defining mesh of components and interface are pretty time consuming in multi-component molding or insert molding CAE simulation. However, Moldex3D eDesign can automatically generate solid mesh for each component of multi-component molding and interface mesh between components, saving a significant amount of time working on connecting each node of interface mesh.
Besides, Moldex3D provides calculation capabilities of coupled deformation behavior of all components of multi-component molding and heat flow issue, like re-melt phenomena between components. Unlike Moldex3D’s comprehensive simulation capabilities, other CAE applications only consider deformation of one component. With Moldex3D, users can experience a realistic and powerful multi-component molding design simulation.
Below is a basic step-by-step tutorial on how to generate a mesh for multi-component simulation.
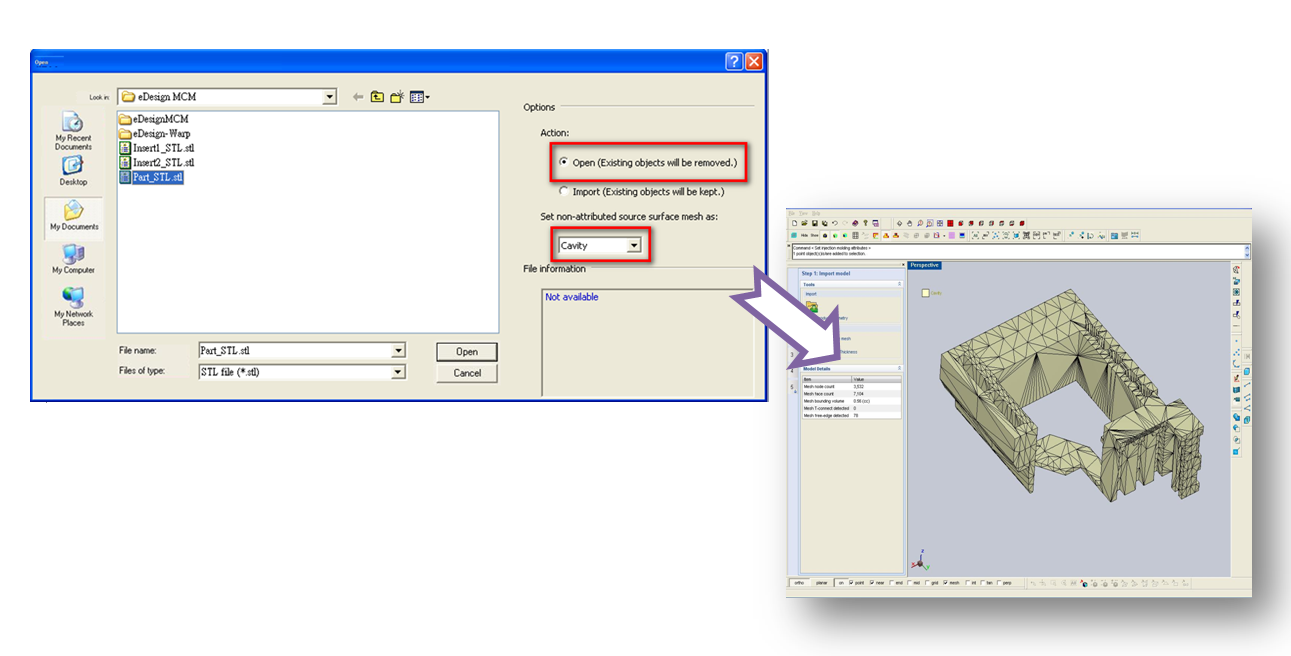
STEP 1. Open main component and set the cavity as the desired object attribute
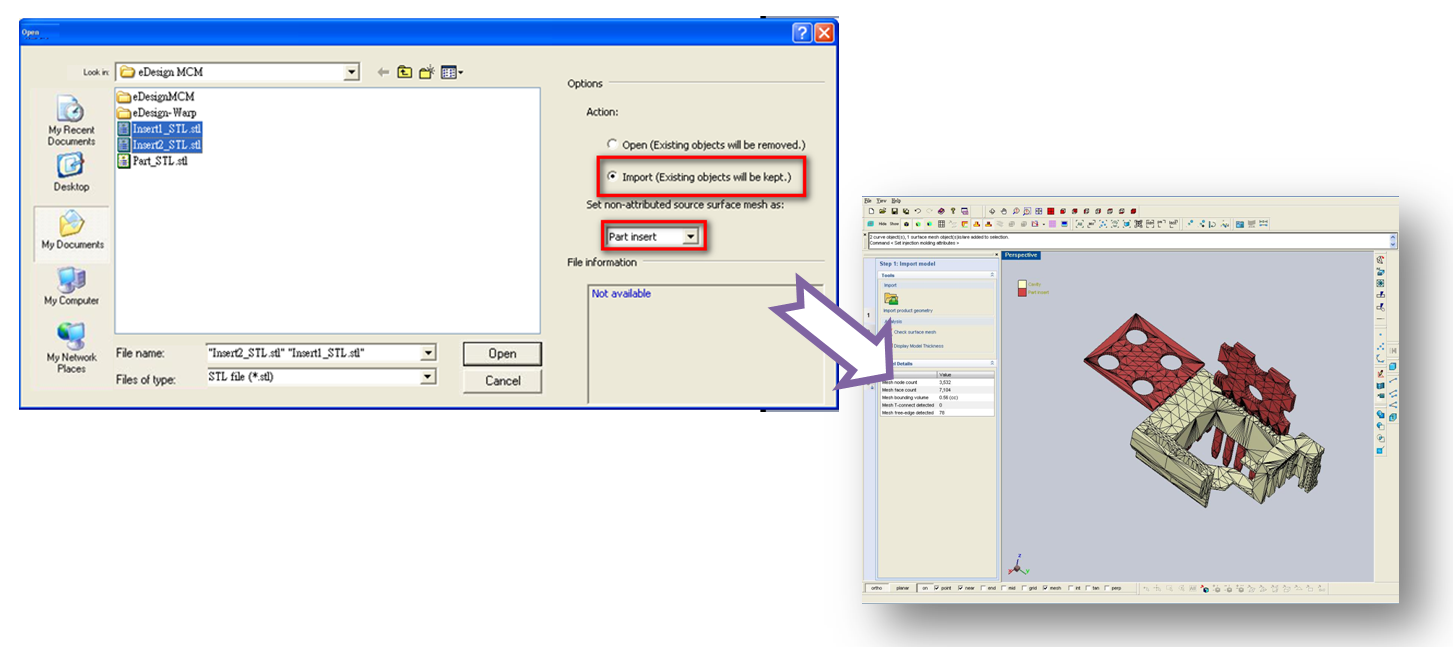
STEP 2. Import “Part insert” and set the desired object attribute
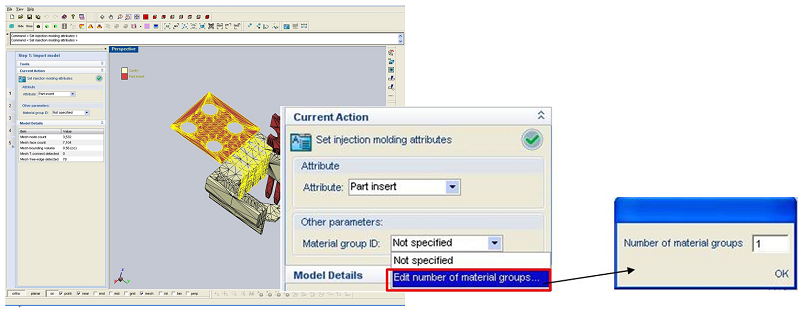
STEP 3. Specify the first material group for the two part-insert components
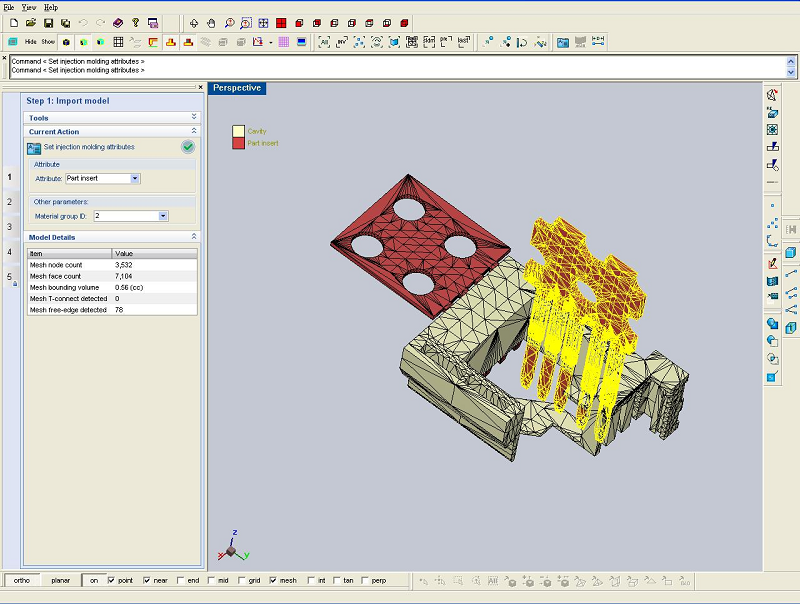
STEP 4. Specify the second material group for the two part-insert components
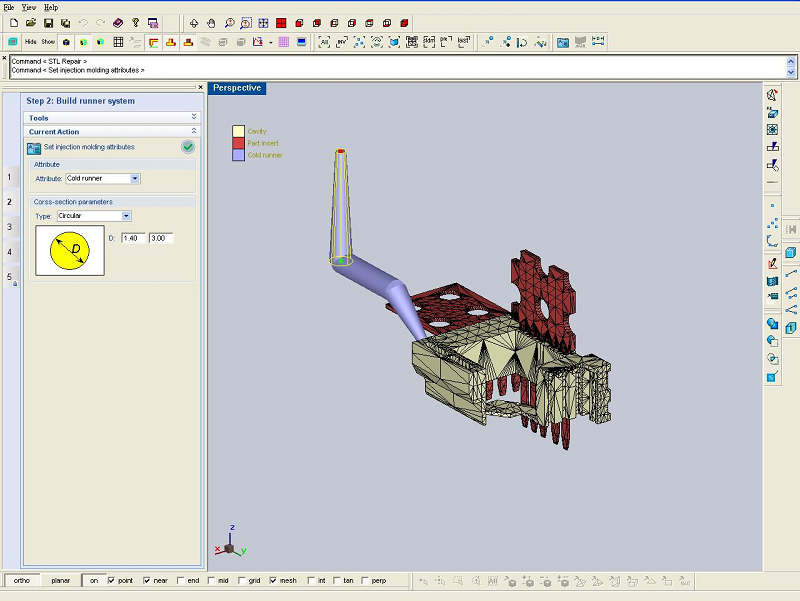
STEP 5. Click Set melt entrance / Build runner
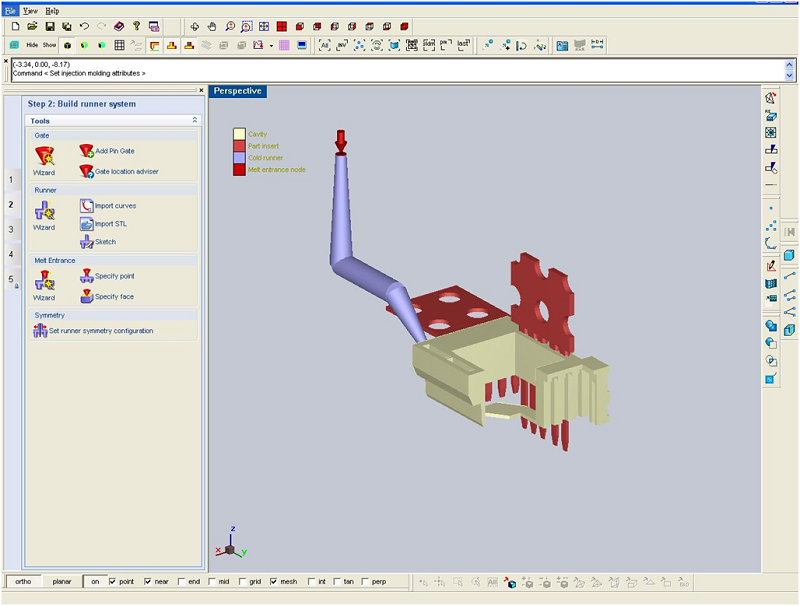
STEP 6. Use ![]() to set the melt entrance point as shown below
to set the melt entrance point as shown below
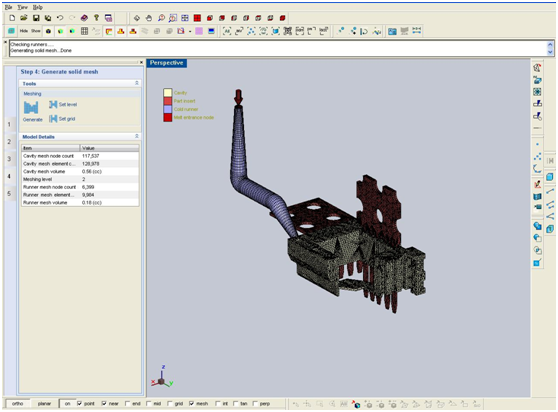
STEP 7. In the workspace, click “Create solid mesh” page button. And then click ![]() to generate the mesh. The mesh will be generated as below
to generate the mesh. The mesh will be generated as below
